
Cecil the Lion Free Crochet Pattern
- Elisa
- Oct 18, 2022
- 5 min read

Happy Tuesday and welcome back to my blog!
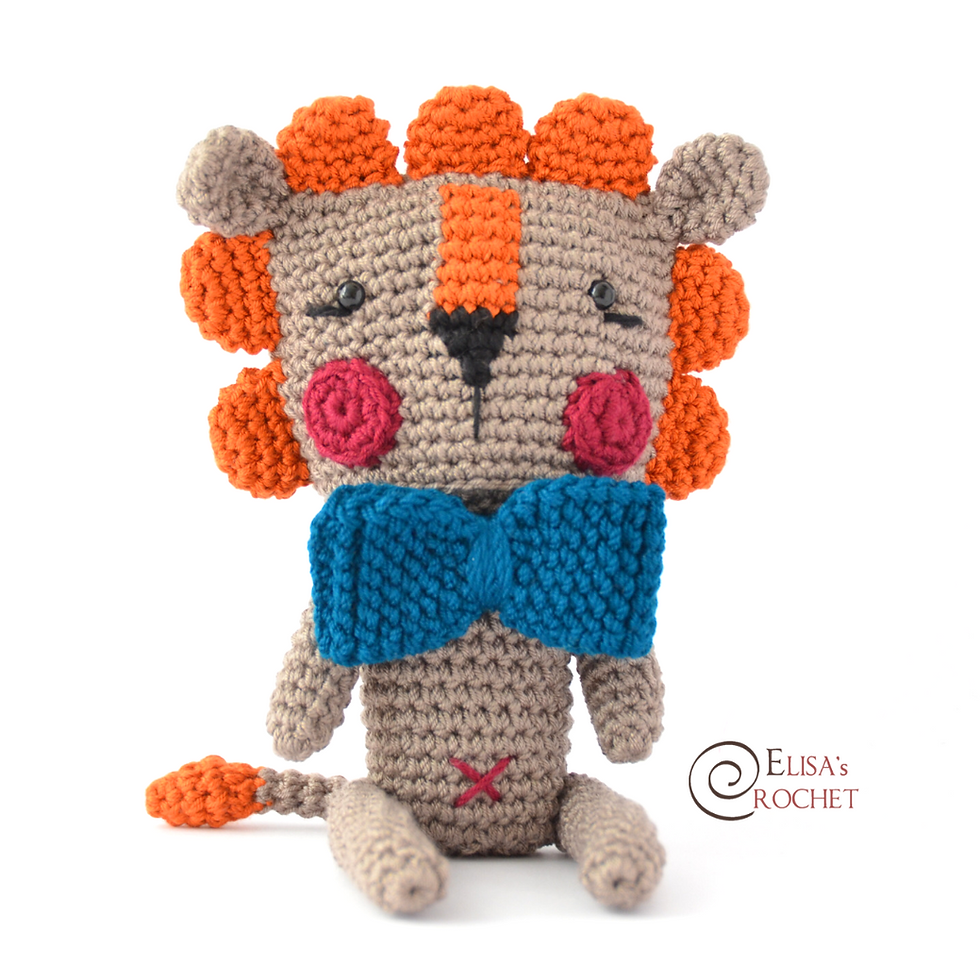
Today I'll be sharing one of my favorite crochet projects - Cecil the Lion!
I designed Cecil the Lion few years ago, but after all this time I'm still in love with it's quirky shapes and sweet eyes! What do you think, isn't he just the cutest?
His big bow-tie is absolutely adorable - it's worked with the Tunisian crochet technique, to create a different texture and extra fluffiness!
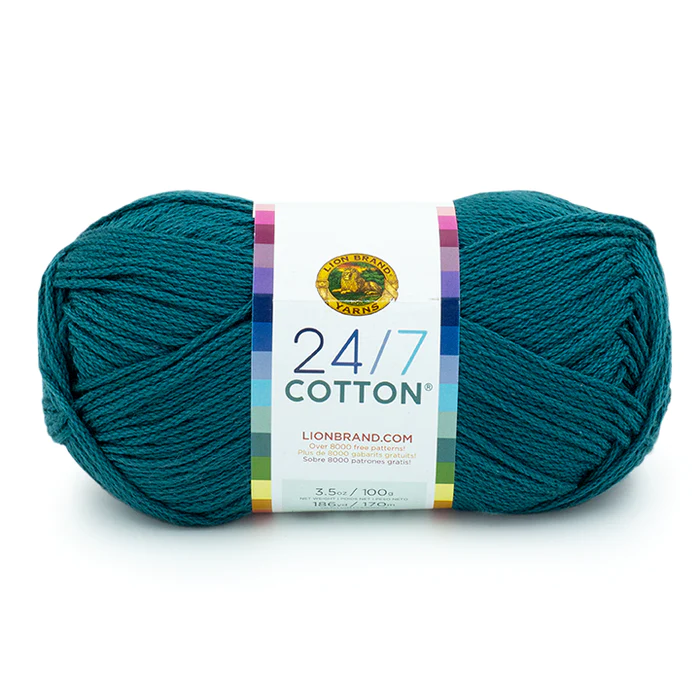
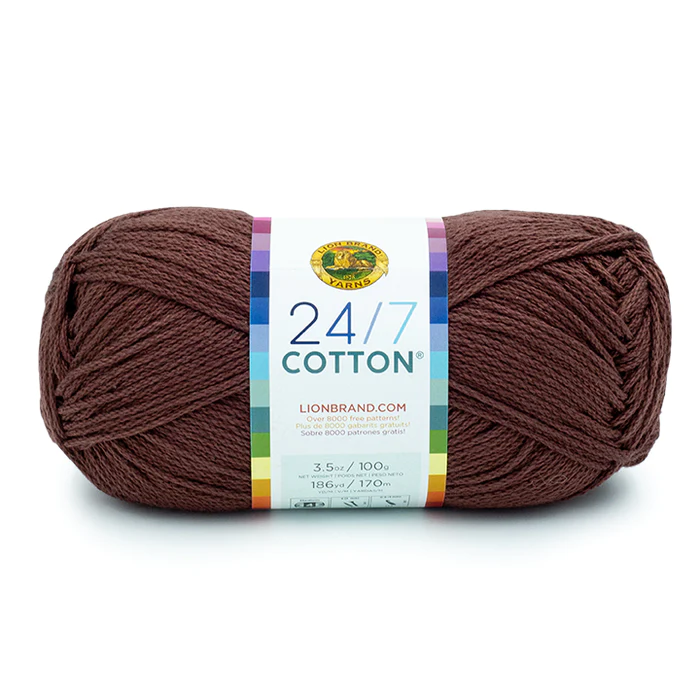
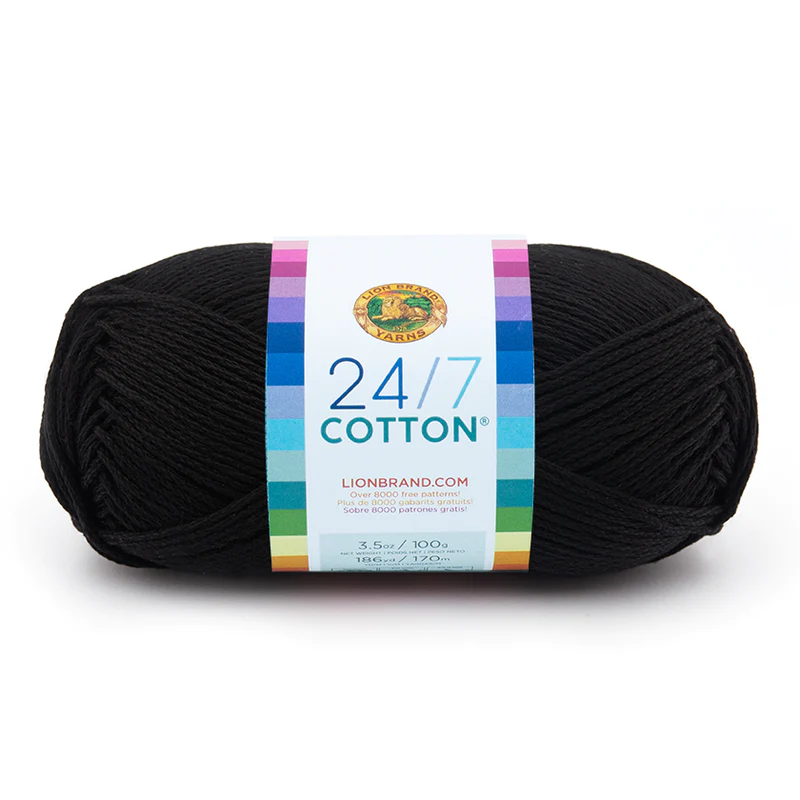
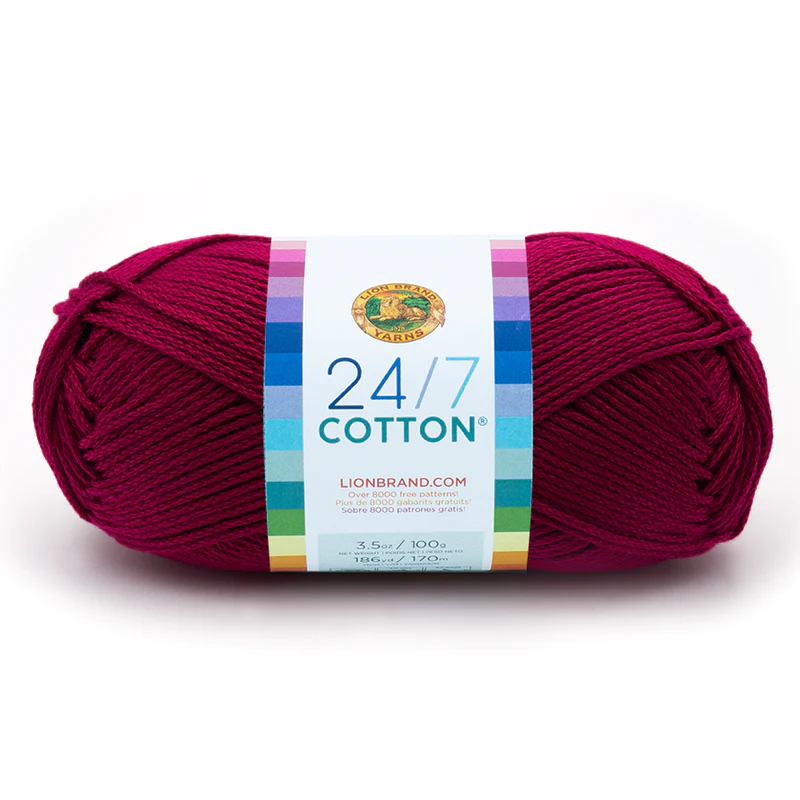
At the time I used the ZZ Twist yarn from Lion Brand to work this project – unfortunately this yarn has been discontinued. You can opt for the 24/7 Cotton yarn by Lion Brand, or use your favorite medium weight yarn.
Are you ready to have some fun?

to support my small business !!

Here's the FREE pattern!
YARN: medium yarn (4) in Brown, Orange, Black, Dark Red, Turquoise
MATERIALS: E/3,50 mm Crochet Hook; Polyester Fiber Filling; Two 6mm Black Plastic Safety Eyes
ABBREVIATIONS: magic ring (mr), chain (ch), slip stitch (sl st), single crochet (sc), back loop only (BLO), decrease (dec), increase (inc), fasten off (F/O)
SKILL LEVEL: Intermediate
INSTRUCTIONS: work in rows (join with a sl st and ch1 at the end of each row) unless otherwise instructed.


Disclosure. Most blog posts on this website contain affiliate links. This means I get a small commission if you click-through & purchase (no additional cost to you).
HEAD (brown, orange and black yarn)
Rnd 1: starting off with brown yarn, 17 ch, 2 sc in the 2nd ch from the hook, 14 sc, 2 sc inc in the last ch, keep working on the other side of the foundation chain, 14 sc, 1 sc inc in the last ch (36)
Rnd 2: 1 sc inc, 1 sc, 1 sc inc, 12 sc, 1 sc inc, 1 sc, 2 sc inc in the next st, 1 sc, 1 sc inc, 12 sc, 1 sc inc, 1 sc, 1 sc inc (44)
Rnd 3: 31 sc, switch to orange yarn, 4 sc, switch back to brown yarn, 9 sc (44)
Rnds 4 - 8: 31 sc, switch to orange yarn, 4 sc, switch back to brown yarn, 9 sc (44)
Rnd 9: 31 sc in brown, 4 sc in black, 9 sc in brown (44)
Rnd 10: 32 sc in brown, 2 sc in black, 10 sc in brown (44)
Rnd 11: 33 sc in brown, 1 sc in black, 10 sc in brown (44)
Rnds 12 - 16: sc even with brown yarn (44); place plastic safety eyes between rounds 7/8, 3 stitches apart from the orange section
Rnd 17: working in BLO, *2 sc, 1 sc dec*, repeat ** around (33)
Rnd 18: working in both loops now, *1 sc, 1 sc dec*, repeat ** around (22); F/O and cut the yarn.
Stuff the head firmly.
Embroider the MOUTH and EYES LINES with some scrap black yarn.
Cheeks (dark red yarn; make two)
Rnd 1: 6 sc in a mr (6)
Rnd 2: sc inc around (12); F/O and leave a long tail of yarn for attaching the cheeks to the head, between rnds # 11-15.
Ears (brown yarn; make two)
Rnd 1: 8 sc in a mr (8)
Rnd 2: *3 sc, 1 sc inc*, repeat ** twice (10)
Rnds 3 - 4: sc even (10)
Rnd 5: *3 sc, 1 sc dec*, repeat ** twice (8); F/O and leave a long tail of yarn to sew the ear to the head. Do not stuff the ear; flatten it instead before attaching it.
Body (brown yarn)
Rnd 1: 7 ch, 2 sc in the 2nd ch from the hook, 4 sc, 2 sc inc in the last ch, keep working on the other side of the foundation chain, 4 sc, 1 sc inc in the last ch that already contains 2 sc (16)
Rnd 2: 1 sc inc, 1 sc, 1 sc inc, 2 sc, 1 sc inc, 1 sc, 2 sc inc in the next st, 1 sc, 1 sc inc, 2 sc, 1 sc inc, 1 sc, 1 sc inc (24)
Rnds 3 - 14: sc even (24)
Rnd 15: working in BLO, *10 sc, 1 sc dec*, repeat ** twice (22); F/O and leave a long tail of yarn to attach the body to the head. Stuff the body firmly before joining.
Embroider a X on the belly with some scrap dark red yarn.
Mane (orange yarn - make 7)
Rnd 1: 6 sc in a mr (6)
Rnd 2: sc inc around (12)
Rnds 3 - 4: sc even (12); F/O and leave a long tail of yarn for sewing the crocheted parts to the head. Do not stuff the crocheted piece, flatten it instead before attaching it.
Arms (brown yarn; make two)
Rnd 1: 6 sc in a mr (6)
Rnd 2: *2 sc, 1 sc inc*, repeat ** twice (8)
Rnds 3 - 10: sc even (8); stuff the arm
Rnd 11: sc dec around (4); F/O and leave a long tail of yarn to sew the arm to the side of the body.
As for attaching the arms to the body, insert the yarn inside the body on one side of the body, pull it out from the other side and insert it in the second arm, pull it out, back into the arm, the body and the first arm; tie the yarn with a knot, F/O and wave in ends. You should be able to move and lift the arms!
Legs (brown yarn; make two)
Rnd 1: 6 sc in a mr (6)
Rnd 2: *2 sc, 1 sc inc*, repeat ** twice (8)
Rnds 3 - 13: sc even (8); stuff the arm
Rnd 14: sc dec around (4); F/O and leave a long tail of yarn to sew the arm to the side of the body.
As for attaching the legs to the body, insert the yarn inside the body on one side of the body, pull it out from the other side and insert it into the second leg, pull it out, back into the leg, the body and the first leg; tie the yarn with a knot, F/O and wave in ends. You should be able to lift the legs and place the doll in a sitting position!
Tail (orange and brown yarn)
Rnd 1: starting off with orange yarn, 4 sc in a mr (4)
Rnd 2: *1 sc, 1 sc inc*, repeat ** twice (6)
Rnd 3: 1 hdc inc, 2 sc, 1 hdc inc (6); ch 1 and turn
Rnd 4: *4 sc, 1 sc inc*, repeat ** twice (10)
Rnd 5: sc dec around (5)
Rnd 6: switch to brown yarn, sc even (5)
Rnds 7 - 14: sc even (5); F/O and leave a long tail of yarn to attach the tail to the back of the body.
BOW-TIE (turquoise yarn)
If you are not familiar with the Tunisian crochet technique, please check out this helpful tutorial:
Crochet 8 ch
Rnds 1-34: work even (8); F/O and leave a long tail of yarn for sewing the two short sides together.
Wrap an extra strand of yarn around the center and attach the bow tie to the body.
For those who prefer to work the bow-tie with simple single crochet stitches follow the instructions below:
Rnd 1: 9 ch, 1 sc in the 2nd ch from the hook, 7 sc (8)
Rnds 2 - 34: sc even (8); F/O and leave a long tail of yarn for sewing the two short sides together.
Wrap an extra strand of yarn around the center and attach the bow tie to the body.

I can't wait to see your version of my CECIL THE LION! Feel free to tag me (@elisascrochet) in your photos on Instagram or Facebook if you'd like!
Elisa
This pattern is an original pattern by Elisa Sartori of Elisa's Crochet. Please do not claim this pattern as your own. If you wish to share this pattern, you may link to this pattern but please do not reprint it on your site. You may keep a copy for your own personal use but please DO NOT sell the pattern or distribute it.
You may sell products made from this pattern but please clearly credit the design to me, Elisa Sartori of Elisa's Crochet. Permission is NOT granted for mass production or factory manufacturing of any kind. Thank you!


