
Zoe the Baby Flamingo Free Crochet Pattern
- Elisa
- Jun 13, 2023
- 7 min read

Who's ready to crochet the cutest Baby Flamingo ever?
Zoe is an old design of mine that deserved a new and improved look!
...and here she is, made with a soft and warm yarn, ready to entertain you little one!
I love revisiting old projects, and Zoe the baby flamingo was on the top of my list.
I reworked the pattern making the instructions clear and easy to follow.
I opted for the usual stuffing for the legs, instead of the metal wire, to keep the toy super safe even for little babies.
As you can see, the result is just adorable!
So, what are you waiting for?...grab your yarn and hook and crochet along with me!
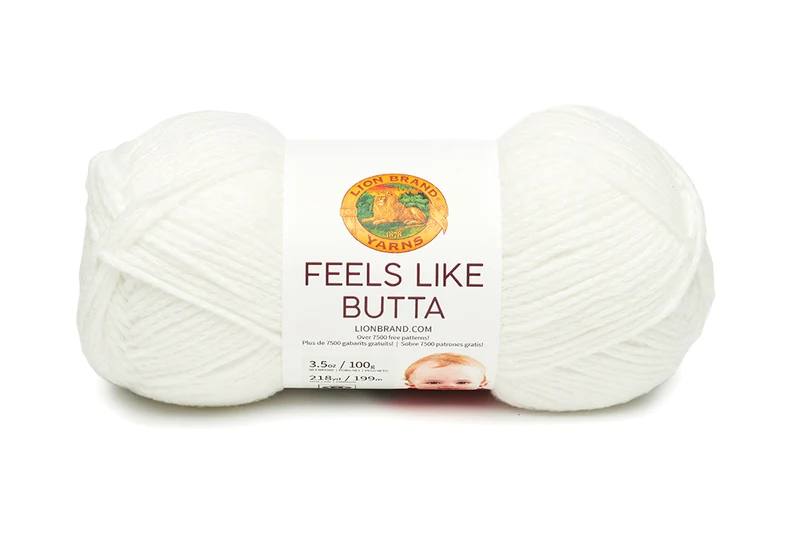
Zoe the Baby Flamingo is made with Feels like Butta® yarn by LION BRAND YARN!
This velvety fiber yarn is incredibly soft and comes in a variety of pastel colors, perfect for baby's projects!

***You can purchase a downloadable AD-FREE PDF of the pattern with more than 40
Here is Zoe the Baby Flamingo FREE Pattern!
EASY
SIZE
About 10 in. tall (15.3 cm)
MATERIALS
Lion Brand® FEELS LIKE BUTTA® (Art. # 215)
#101A Pink 1 ball (A)
#140M Dusty Pink 1 ball (B)
#153 Black (C)
#100 White (D)
OTHER MATERIALS
Crochet Hook Size F (3.75 mm)
Poly Stuffing
Black embroidery floss
Tapestry Needle
GAUGE
18 sc + 20 rows = about 4 in. (10 cm).
ABBREVIATIONS
beg = begin(ninig)
ch = chain
rep = repeat
rnd(s) = round(s)
sc = single crochet
hdc = half double crochet
sl st = slip stitch
st(s) = stitch(es)


Disclosure. Most blog posts on this website contain affiliate links. This means I get a small commission if you click-through & purchase (no additional cost to you).
Head and Body
With A, make a magic ring.
Rnd 1: work 6 sc in ring.
Rnd 2: 2 sc in each st around – 12 sc.
Rnd 3: * sc in next st, 2 sc in next st; rep from * around – 18 sc.
Rnd 4: * sc in next 2 sts, 2 sc in next st; rep from * around – 24 sc.
Rnd 5: * sc in next 3 sts, 2 sc in next st; rep from * around – 30 sc.
Rnd 6: 1 sc in each st around – 30 sc.
Rnd 7: * sc in next 4 sts, 2 sc in next st; rep from * around – 36 sc.
Rnds 8 - 9: 1 sc in each st around – 36 sc.
Rnd 10: * sc in next 5 sts, 2 sc in next st; rep from * around – 42 sc.
Rnd 11: * sc in next 6 sts, 2 sc in next st; rep from * around – 48 sc.
Rnd 12: * sc in next 7 sts, 2 sc in next st; rep from * around – 54 sc.
Rnds 13 - 15: 1 sc in each st around – 54 sc.
Rnd 16: * sc in next 7 sts, sc2tog; rep from * around – 48 sc.
Rnd 17: * sc in next 6 sts, sc2tog; rep from * around – 42 sc.
Begin stuffing piece and continue stuffing until piece is complete.
Rnd 18: * sc in next 5 sts, sc2tog; rep from * around – 36 sc.
Rnd 19: * sc in next 4 sts, sc2tog; rep from * around – 30 sc.
Rnd 20: * sc in next 3 sts, sc2tog; rep from * around – 24 sc.
Rnd 21: * sc in next 2 sts, sc2tog; rep from * around – 18 sc.
Rnds 22 - 25: 1 sc in each st around – 18 sc.
Rnd 26: 1 sl st, ch 12, 2 sc into the 2nd ch from the hook, 1 sc in each of the next 10 chs, continue working on the neck, 1 sc in each of the next 18 sts, 1 sc in each of the next 10 chs, 2 sc into the next ch – 42 sc.
Rnd 27: 1 sc in each of the next 2 sts, * 2 sc in next st, sc in next st; rep from * 5 times, 1 sc in each of the next 18 sts, * 2 sc in next st, sc in next st; rep from * 5 times, 1 sc in each of the next 2 sts – 52 sc.
Rnds 28 - 30: 1 sc in each st around – 52 sc.
Rnd 31: sc2tog, 1 sc in each of the next 4 sts, sc2tog, 1 sc in each of the next 8 sts, sc2tog, 1 sc in each of the next 16 sts, sc2tog, 1 sc in each of the next 8 sts, sc2tog, 1 sc in each of the next 4 sts, sc2tog – 46 sc.
Rnd 32: 1 sc in each of the next 14 sts, sc2tog, 1 sc in each of the next 14 sts, sc2tog, 1 sc in each of the next 14 sts – 44 sc.
Rnd 33: 1 sc in each of the next 13 sts, sc2tog, 1 sc in each of the next 14 sts, sc2tog, 1 sc in each of the next 13 sts – 42 sc.
Rnd 34: * sc in next 5 sts, sc2tog; rep from * around – 36 sc.
Rnd 35: 1 sc in each st around – 36 sc.
Rnd 36: * sc in next 4 sts, sc2tog; rep from * around – 30 sc.
Rnd 37: * sc in next 3 sts, sc2tog; rep from * around – 24 sc.
Rnd 38: 1 sc in each st around – 24 sc.
Rnd 39: * sc in next 1 sts, sc2tog; rep from * around – 16 sc.
Rnd 40: sc2tog around – 8 sc.
Fasten off, leaving a long tail. Thread tail through top of sts of last rnd. Pull tail to close opening and knot securely.
Cheeks (make two)
With B, make a magic ring.
Rnd 1: work 6 sc in ring.
Fasten off, leaving a long strand for sewing Cheeks to Head.
Beak
With C, make a magic ring.
Rnd 1: work 5 sc in ring.
Rnd 2: 2 hdc into the next st, sc into the next 4 sts – 6 sts.
Rnd 3: 2 hdc into the next st, sc into the next 5 sts – 7 sts.
Rnd 4: 2 hdc into the next st, sc into the next 6 sts – 8 sts.
Rnd 5: 2 hdc into the next st, sc into the next 7 sts – 9 sts.
Rnd 6: 2 hdc into the next st, sc into the next 8 sts – 10 sts.
Rnd 7: With D, sc into the next 10 sts – 10 sc.
Rnd 8: 1 sc in each st around – 10 sc.
Fasten off, leaving a long strand for sewing Beak to Head.
Stuff Beak.
Legs (make two)
With B, make a magic ring.
Rnd 1: work 6 sc in ring.
Rnds 2 - 10: 1 sc in each st around – 6 sc.
Begin stuffing piece lightly and continue stuffing until piece is complete.
Rnd 11: * sc in next 1 sts, 2 sc in the next st; rep from * around – 9 sc.
Rnd 12: 1 sc in each st around – 9 sc.
Rnd 13: * sc in next 1 sts, sc2tog; rep from * around – 6 sc.
Rnds 14 - 18: 1 sc in each st around – 6 sc.
Fasten off, leaving a long strand for sewing Legs to Body.
Feet (make two)
With B, make a magic ring.
Rnd 1: work 6 sc in ring.
Rnd 2: * sc in next 2 sts, 2 sc in the next st; rep from * twice – 8 sc.
Rnd 3: * sc in next 3 sts, 2 sc in the next st; rep from * twice – 10 sc.
Rnd 4: 1 sc in each st around – 10 sc.
Do not stuff the Foot.
Row 5: Flatten last rnd and crochet through both layers, 1 sc in next 5 sts – 5.
Fasten off, leaving a long strand for sewing Foot to Leg.
Wings (make two)
With B, make a magic ring.
Rnd 1: work 6 sc in ring.
Rnd 2: * sc in next 2 sts, 2 sc in the next st; rep from * twice – 8 sc.
Rnd 3: * sc in next 3 sts, 2 sc in the next st; rep from * twice – 10 sc.
Rnd 4: * sc in next 4 sts, 2 sc in the next st; rep from * twice – 12 sc.
Rnd 5: * sc in next 5 sts, 2 sc in the next st; rep from * twice – 14 sc.
Rnd 6: * sc in next 6 sts, 2 sc in the next st; rep from * twice – 16 sc.
Rnd 7: * sc in next 7 sts, 2 sc in the next st; rep from * twice – 18 sc.
Rnds 8 - 9: 1 sc in each st around – 18 sc.
Rnd 10: * sc in next st, sc2tog; rep from * around – 12 sc.
Rnd 11: * sc in next 2 st, sc2tog; rep from * around – 9 sc.
Do not stuff the Wing.
Row 12: Flatten last rnd and crochet through both layers, 1 sc in next 4 sts – 4.
Fasten off, leaving a long strand for sewing Wing to Body.
FINISHING
With D, sew Beak to Head between Rnds 10 and 14.
With embroidery thread, embroider Eyes between Rnds 8 and 11, 8 sts apart.
With B, sew Cheeks between Rnds 12 and 15.
With B, sew Wings to side of Body, around Rnd 29.
With B, sew Feet to Legs.
With B, sew Legs to bottom of Body.
Weave in ends.


I can't wait to see your version of my ZOE THE BABY FLAMINGO! Feel free to tag me (@elisascrochet) in your photos on Instagram or Facebook!
Elisa
This pattern is an original pattern by Elisa Sartori of Elisa's Crochet. Please do not claim this pattern as your own. If you wish to share this pattern, you may link to this pattern but please do not reprint it on your site. You may keep a copy for your own personal use but please DO NOT sell the pattern or distribute it.
You may sell products made from this pattern but please clearly credit the design to me, Elisa Sartori of Elisa's Crochet. Permission is NOT granted for mass production or factory manufacturing of any kind. Thank you!