
Pumpkin Wreath Free Crochet Pattern
- Elisa
- Aug 24, 2021
- 3 min read


Despite the Summer sun is still shining above and the sound of cicadas is loud and clear in my backyard, I couldn't resist but working on a new fun Fall project!
Pumpkins are one of my favorite subjects and are the perfect addition for any fall inspired home decorations.
I wanted to combine the cute crocheted pumpkins with burlap ribbon and flowers, and a twine wreath to get a nice rustic look!
***You can purchase a downloadable AD-FREE PDF of the pattern with many step-by-step pictures onEtsyHERE.
Here's the FREE pattern!

YARN: Light Yarn (3) in Antique White, Rust, Sage and Brown
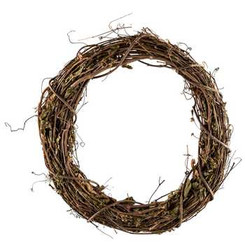
MATERIALS: 3.5 mm Crochet Hook; 10” x 10” Twine Wreath; 2” wide Burlap; Metal Wire; Hot Glue Gun; Polyester Fiber Filling
DIMENSION: 10” x 10”
ABBREVIATIONS: stitch (st), slip stitch (sl st), single crochet (sc), decrease (dec), increase (inc), back loop only (BLO), fasten off (F/O), magic ring (mr)
SKILL LEVEL: Beginner


Disclosure. Most blog posts on this website contain affiliate links. This means I get a small commission if you click-through & purchase (no additional cost to you).
PUMPKIN (antique white / rust / sage yarn)
Rnd 1: 8 sc in a mr (8)
Rnd 2: sc inc around (16)
Rnd 3: (1 sc, 1 sc inc) rep around (24)
Rnd 4: (2 sc, 1 sc inc) rep around (32)
Rnd 5: (3 sc, 1 sc inc) rep around (40)
Rnd 6: (4 sc, 1 sc inc) rep around (48)
Rnd 7 - 18: sc even (48); start stuffing the pumpkin
Rnd 19: (4 sc, 1 sc dec) rep around (40)
Rnd 20: (3 sc, 1 sc dec) rep around (32)
Rnd 21: (2 sc, 1 sc dec) rep around (24)
Rnd 22: (1 sc, 1 sc dec) rep around (16); finish stuffing
Rnd 23: sc dec around (8); F/O, close the hole and leave a very long tail of yarn to create the pumpkin bumps.
How to create the pumpkin bumps:
Insert the needle up through the center and pull it out on the other side, wrap it around the pumpkin back to the bottom, stick the needle back up through the center and pull it tight so that it squeezes the pumpkin. Continue wrapping it around so that you end up with 6 bumps.
STEM (brown yarn)
Rnd 1: 6 sc in a mr (8)
Rnd 2: working in BLO, sc even (8)
Rnd 3 - 4: working in both loops now, sc even (8); F/O and leave a long tail to attach the stem on top of the pumpkin.
BURLAP FLOWERS
Cut a piece of burlap ribbon about 8” in length. Fold in half lengthwise. Angle down the upper corner and glue it to keep it in place.
Start rolling the burlap around the center. Keep folding it while rolling and use the hot glue to make it solid. Make 3 or 4 flowers.
ASSEMBLING THE WREATH
Cut a piece of burlap ribbon about 18” in length. Wrap it loosely around one side of the wreath. Secure the ends to the back part with hot glue.
Cut 3 pieces of metal wire about 4” in length. Stick the wire through the bottom of the pumpkin. Then push the wire through the wreath and twist to secure.
Hot glue the burlap flowers to the wreath in the preferred position.

I can't wait to see your version of my PUMPKIN WREATH! Feel free to tag me (@elisascrochet) in your photos on Instagram or Facebook if you'd like!
Elisa
This pattern is an original pattern by Elisa Sartori of Elisa's Crochet. Please do not claim this pattern as your own. If you wish to share this pattern, you may link to this pattern but please do not reprint it on your site. You may keep a copy for your own personal use but please DO NOT sell the pattern or distribute it.
You may sell products made from this pattern but please clearly credit the design to me, Elisa Sartori of Elisa's Crochet. Permission is NOT granted for mass production or factory manufacturing of any kind. Thank you!


