Violet the Alpaca Free Crochet Pattern
- Elisa
- Jun 15, 2021
- 6 min read


If you have been following my work for the past few years, you have probably noticed that I love redoing and improving old patterns of mine.
I like to go through my first designs and look for ways to give my amigurumis a nicer and more appealing look.
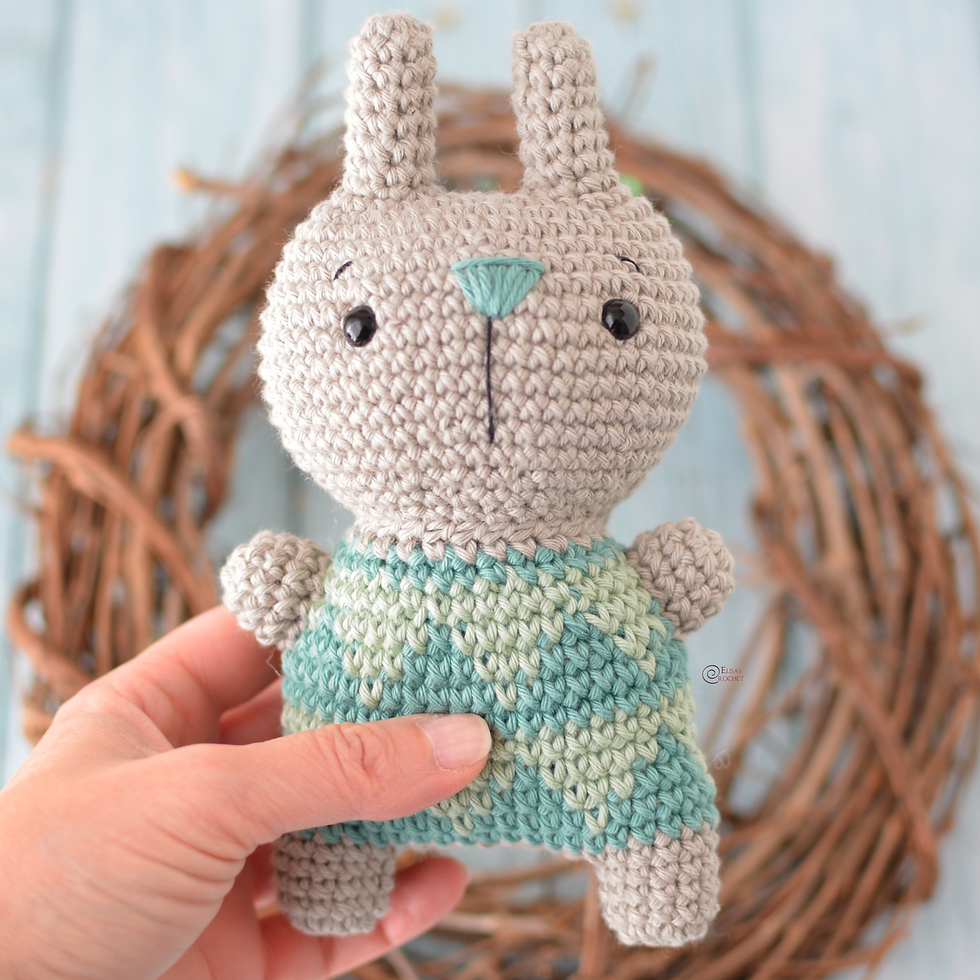
That's what I've done with one of my old favorite...Violet the Alpaca!
Since I wasn't fully happy with how the legs were attached to the body, I decided to give this section of the amigurumi a completely twist and make the Alpaca standing on just two legs.
Also, since I absolutely love the knitted look, I revisited the blanket and made with the Tunisian crochet technique. The wrong side of the "knitted" blanket has such a great texture!
If you are not familiar with this technique, make sure to check this very helpful tutorial from One Dog Woof!!
https://www.youtube.com/watch?v=Th2i-rTGs-k&ab_channel=OneDogWoof
_________________________________________________________________________________
***You can purchase a downloadable AD-FREE PDF of the pattern with many step-by-step pictures on EtsyHERE.
Here's the FREE pattern!

YARN: Bulky (5) in Beige; Light (3) in Yellow; Cotton Thread in Black
MATERIALS: 4.5 mm & 4 mm Hooks; 5 mm Tunisian Crochet Hook; Poly Filling
DIMENSION: 10” x 6”
ABBREVIATIONS: magic ring (mr), stitch (st), slip stitch (sl st), single crochet (sc), front loop only (FLO), Tunisian simple stitch (TSS), fasten off (F/O)
SKILL LEVEL: Intermediate INSTRUCTIONS: work in rounds
(join with a sl st and ch 1 at the end of each round) unless otherwise instructed.


Disclosure. Most blog posts on this website contain affiliate links. This means I get a small commission if you click-through & purchase (no additional cost to you).
HEAD and BODY (beige yarn; 4.5 mm hook)
Rnd 1: 6 sc in a mr (6)
Rnd 2: sc inc around (12)
Rnd 3: (1 sc, 1 sc inc) rep around (18)
Rnd 4: (2 sc, 1 sc inc) rep around (24)
Rnd 5 - 8: sc even (24)
Rnd 9: (2 sc, 1 sc dec) rep around (18)
Rnd 10: (1 sc, 1 sc dec) rep around (12)
Rnd 11: working in FLO, sc even (12)
Rnd 20 - 21: sc even (12); stuff the head and the neck
Rnd 22: ch 10, 2 sc in the 2nd chain from the hook, 8 sc, crochet around the neck 12 sc, keep working in the chains, 8 sc, 2 sc in the last st (32)
Rnd 23: 3 sc in the 1st st, 13 sc, 1 sc inc, 3 sc, 1 sc inc, 12 sc, 3 sc in the last st (38)
Rnd 24: 2 sc inc, 16 sc, 2 sc inc, 16 sc, 2 sc inc (44)
Rnd 25: 1 sc dec, 40 sc, 1 sc dec (42)
Rnd 26 - 27: sc even (42)
Rnd 28: 1 sc dec, 38 sc, 1 sc dec (40)
Rnd 29 - 30: sc even (40)
First leg:
Rnd 1: work 7 sc; flatten the body, turn the work, so now you are facing the wrong side of the last worked stitches, then find the 7th st from the end of the previous round, insert the hook into the st and work 1 sc, then work 1 sc in each one of the next 6 sts (14)
Rnd 2: sc even (14)
Rnd 3: (5 sc, 1 sc dec) rep around (12)
Rnd 4: sc even (12)
Rnd 5: (4 sc, 1 sc dec) rep around (10)
Rnd 6: sc even (10)
Rnd 7: (3 sc, 1 sc dec) rep around (8)
Rnd 8: sc even (8)
F/O, cut the yarn, close the hole and wave in end.
Second leg:
Rnd 1: count 7 sts from the 7th one of the 1st round of the 1st leg, insert the hook into the st and work 1 sc, then work 1 sc in each one of the next 13 sts (14); close the rnd by joining the yarn with a sl st to the 1st st of the round
Rnd 2: sc even (14)
Rnd 3: (5 sc, 1 sc dec) rep around (12)
Rnd 4: sc even (12)
Rnd 5: (4 sc, 1 sc dec) rep around (10)
Rnd 6: sc even (10)
Rnd 7: (3 sc, 1 sc dec) rep around (8)
Rnd 8: sc even (8)
F/O, cut the yarn, close the hole and wave in end.
Stuff the body and the legs firmly.
Row 1: still holding the alpaca upside down, work on one side of the opening, inserting the hook into the 1st of the 6 remaining stitches, work 1 sc into the same st, and then 1 sc in each of the next 5 st (6); ch 1 and turn
Row 2: sc even (6); ch 1 and turn
Row 3: sc even (6)
F/O and leave a long tail of yarn to sew the flap to the other side of the opening. Use the extra length to also close the gaps between the flap and the legs.
MUZZLE (beige yarn; 4.5 mm hook)
Rnd 1: 6 sc in a mr (6)
Rnd 2: inc around (12)
Rnd 3 - 4: sc even (12)
F/O and leave a long tail for sewing the muzzle to the head between rnds # 5-10.
Stuff it while sewing it.
Embroider 4 sts long EYES with black cotton thread, between rnds # 5-6.
Embroider the NOSE on the muzzle with black cotton thread.
EARS (beige yarn; make two; 4 mm hook)
Rnd 1: 4 sc in a mr (4)
Rnd 2: (2 sc, 1 sc inc) rep twice (6)
Rnd 3: 2 sc, 2 sc inc, 2 sc (8)
Rnd 4: 1 sc dec, 1 sc, 2 sc inc, 1 sc, 1 sc dec (8)
F/O and leave a long strand of yarn. Do not stuff the ear, flatten it instead before sewing it onto the head between rnds # 1-5. Use some scrap yellow yarn to add two little tassels to the tip of the ears. Open up the yarn fibers.
TAIL (beige yarn; 4.00 mm hook)
Rnd 1: 5 ch, 1 sc into the 2nd ch from the hook, 3 sc (4)
F/O and leave a long strand of yarn for sewing the tail to the back of the body between rnds # 24-25.
BLANKET (yellow yarn; tapestry 5.00 mm hook)
Step 1: chain 8
Step 2: insert your hook into the 2nd ch from your hook, yarn over (wrap the yarn over your hook) and pull the strand of yarn through the first loop on your hook. (This adds one loop onto your hook)
Step 3: insert your hook into the next chain, yarn over (wrap the yarn over your hook) and pull the strand of yarn through the first loop on your hook. (This adds one loop onto your hook).
Repeat steps 3 for each chain across.
When you are done you should have 8 loops on your hook.
Now let’s finish this row of Tunisian simple stitches by working in the other direction.
Step 4: yarn over (wrap yarn over your hook), pull the strand of yarn through the first loop on your hook. (There should still be 8 loops on your hook)
Step 5: Yarn over (wrap yarn over your hook), pull the strand of yarn through the next 2 loops on your hook. (There should now be 1 less loop on your hook).
Repeat steps 5 until there is only 1 loop left on your hook
Step 6: Insert your hook between the 2 vertical bars of the 2nd st. Yarn over (wrap yarn over your hook). Pull the strand of yarn through the first loop on your hook (This adds one loop onto your hook). Do the same for each stitch across. When you are done you should have 8 loops on your hook. Make a total of 25 rows.
Add 8 tassels to each short side of the blanket.
Put the blanket onto the alpaca’s back. The wrong side should be facing up.

I can't wait to see your version of my VIOLET THE ALPACA! Feel free to tag me (@elisascrochet) in your photos on Instagram or Facebook if you'd like!
Elisa
This pattern is an original pattern by Elisa Sartori of Elisa's Crochet. Please do not claim this pattern as your own. If you wish to share this pattern, you may link to this pattern but please do not reprint it on your site. You may keep a copy for your own personal use but please DO NOT sell the pattern or distribute it.
You may sell products made from this pattern but please clearly credit the design to me, Elisa Sartori of Elisa's Crochet. Permission is NOT granted for mass production or factory manufacturing of any kind. Thank you!