
Weave Wallet Free Crochet Pattern
- Elisa
- May 2, 2023
- 5 min read

Hello my friends and welcome to my blog!
I'm finally back with my Tuesday free crochet pattern appointment and I'm super excited to share a project that I absolutely love!
The Weave Wallet is not just useful, it's also a gorgeous accessory that you'll be proud to carry in your purse every day!
The outside of the wallet is worked with a series of Front and Back Post double crochet stitches to create a beautiful basket design. The inside has 2 big compartments and 4 credit card slots.


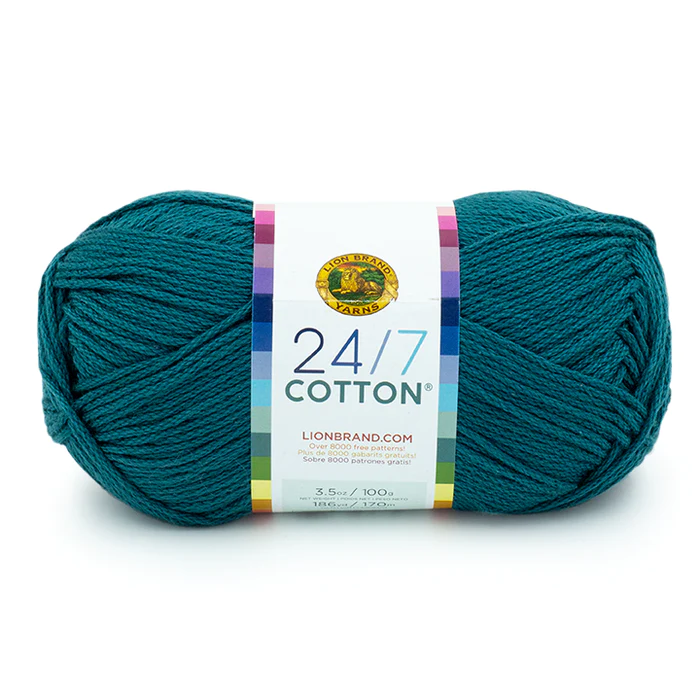
The wallet is made with 24/7 Cotton® yarn by LION BRAND YARN! This is a mercerized 100% natural fiber yarn - the incredible color variety and the beautiful sheer make this fiber just perfect to work accessories and home decor!

***You can purchase a downloadable AD-FREE PDF of the pattern with more than 40
Here is the FREE pattern!
YARN:
Lion Brand® 24/7 COTTON® (Art. # 761) #177J Dragonfly 2 balls
ADDITIONAL MATERIALS:
Lion Brand® crochet hook size B/C (2.5 mm); 2 Magnetic Sew in Magnetic Snaps; Sewing Thread in Teal color
SIZE:
About 7 X 4 in. (18 x 10 cm)
ABBREVIATIONS:
beg = begin(ninig)
ch = chain
hdc = half double crochet
dc = double crochet
FPdc = front post double crochet
BPdc = back post double crochet
rep = repeat
rnd(s) = round(s)
sc = single crochet
sl st = slip stitch
st(s) = stitch(es)
SKILL LEVEL:
Intermediate


Disclosure. Most blog posts on this website contain affiliate links. This means I get a small commission if you click-through & purchase (no additional cost to you).
STITCH EXPLANATIONS
FPdc (front post double crochet): Yarn over once. Insert the hook from the front, around the post, coming out again at the front. Yarn over and draw up one loop. Complete the double crochet as usual.
BPdc (back post double crochet): Yarn over once. Insert the hook from the back, around the post, coming out again at the back. Yarn over and draw up one loop in the back of the piece and complete the stitch as usual.
Main Panel
Row 1: work 41 chs, 1 sc into the 2nd ch from the hook, 1 sc in each of the next 39 chs – 40 sc; Turn.
Row 2: Ch 1, 1 sc in each st along – 40 sc; Turn
Rows 3 - 12: rep Row 2 – 40 sc; Turn
Row 13: Ch1, working in back loop only (this will help to fold the previous section), 1 sc in each st along – 40 sc; Turn
Rows 14 - 34: rep Row 2 – 40 sc; Turn
Rnd 35: Ch 2, 1 dc in each st along – 40 dc; Turn
Rnd 36: Ch 2, 1 dc into the 1st st, * 1 Fpdc into the next 2 sts, 1 Bpdc into the next 2 st; rep from * 9 times, 1 Fpdc into the next 2 sts, 1 dc into the last st – 40 sts; Turn
Rnd 37: Ch 2, 1 dc into the 1st st, * 1 Fpdc into the next 2 sts, 1 Bpdc into the next 2 st; rep from * 9 times, 1 Fpdc into the next 2 sts, 1 dc into the last st – 40 sts; Turn
Rnd 38: Ch 2, 1 dc into the 1st st, * 1 Bpdc into the next 2 sts, 1 Fpdc into the next 2 st; rep from * 9 times, 1 Bpdc into the next 2 sts, 1 dc into the last st – 40 sts; Turn
Rnd 39: Ch 2, 1 dc into the 1st st, * 1 Bpdc into the next 2 sts, 1 Fpdc into the next 2 st; rep from * 9 times, 1 Bpdc into the next 2 sts, 1 dc into the last st – 40 sts; Turn
Rows 40 - 47: rep rows from 36 to 39 – 40 sts; Turn
Rnd 48: Ch 2, 1 dc into the 1st st, * 1 Fpdc into the next 2 sts, 1 Bpdc into the next 2 st; rep from * 9 times, 1 Fpdc into the next 2 sts, 1 dc into the last st – 40 sts; Turn
Rnd 49: Ch 2, 1 dc into the 1st st, * 1 Fpdc into the next 2 sts, 1 Bpdc into the next 2 st; rep from * 9 times, 1 Fpdc into the next 2 sts, 1 dc into the last st – 40 sts; Turn
Rnd 50: Ch 2, 1 dc into the 1st st, * 1 Bpdc into the next 2 sts, 1 Fpdc into the next 2 st; rep from * 9 times, 1 Bpdc into the next 2 sts, 1 dc into the last st – 40 sts; Turn
Row 51: Ch 1, working in back loop only (this will help to fold the next section), 1 sc in each st along – 40 sc; Turn
Rows 52 - 64: Ch 1, 1 sc in each st along – 40 sc
Fasten off leaving a long tail.
Pocket Panel I
Row 1: work 41 chs, 1 sc into the 2nd ch from the hook, 1 sc in each of the next 39 sts – 40 sc; Turn.
Row 2: Ch 1, 1 sc in each st along – 40 sc; Turn
Rows 3 - 12: rep Row 2 – 40 sc
Pocket Panel II
Row 1: work 41 chs, 1 sc into the 2nd ch from the hook, 1 sc in each of the next 39 sts – 40; Turn.
Row 2: Ch 1, 1 sc in each st along – 40 sc; Turn
Rows 3 - 14: rep Row 2 – 40 sc
Finishing
Assemble Wallet as follows:
Sew one long side of Pocket Panel I to the Main Panel, between Rows 16 and 17.
Sew the short sides of Pocket Panel I to the sides of Main Panel.
Sew one long side of Pocket Panel II to the Main Panel, between Rows 46 and 47.
Sew the short sides of Pocket Panel II to the sides of Main Panel.
Fold the Rows 1 to 12 and Rows 51 to 64 sections toward the inside of the wallet and sew the sides to the Main Panel.
In order to create 4 small credit card slots out of the two long pockets (made from the Rows 1 - 12 section and Pocket Panel I), sew a straight vertical line.
Sew the magnetic snaps on, 7 sts from the sides of the Wallet.
Weave in ends


I can't wait to see your version of my WEAVE WALLET! Feel free to tag me (@elisascrochet) in your photos on Instagram or Facebook!
Elisa
This pattern is an original pattern by Elisa Sartori of Elisa's Crochet. Please do not claim this pattern as your own. If you wish to share this pattern, you may link to this pattern but please do not reprint it on your site. You may keep a copy for your own personal use but please DO NOT sell the pattern or distribute it.
You may sell products made from this pattern but please clearly credit the design to me, Elisa Sartori of Elisa's Crochet. Permission is NOT granted for mass production or factory manufacturing of any kind. Thank you!